How to Physically Prepare for a Mountain Hunt without Entering a Gym
I once read an article about a group of young 20-somethings from out East who were planning a backcountry elk hunting trip together and described their physical preparation. It was a cringe-worthy plan as they described collapsing in pools of their own sweat day-in and day-out in order to get ready for mountainous terrain. While the hard work is certainly admirable, I would lay down my entire life’s savings to say that if these folks continued training in this manner every year that by age 40 they would no longer be capable of pursuing elk.
Over the course of the few years I have gone after elk, and trained for the pursuit in Minnesota where a hill is hard to come by, I have approached the physical preparation numerous ways. In those years, I have honed in on a new philosophy for training in a large part because my life goal for elk hunting has changed. It is my hope that I can still walk onto public land at the age of 55, or even 60, for a backcountry hunt. In order to do this, overall physical maintenance has become more important to me than pushing my body to its physical limit in training. I have never puked while training, I have never collapsed in a puddle of my own sweat, but I would bet I could out-hike a high percentage of individuals over the course of 3-5 days, more because I’m lazy and slow than a fit athlete, with my goal being to be able to do that for a few more decades.
For hunters who are planning a trip out West from a flatland state, believe me, I know your fears. There’s nothing you can find east of the Rockies that can replicate the type of terrain that you will face in the mountains. Every time I have started a hunt after making the drive from Minnesota, I have looked up at the mountain faces and had a gut wrenching moment taking in their sheer size. However, these pursuits out West are more about grit and persistence than about being able to sprint up the mountainside.
Given what I have learned preparing for hunts out West from a flatland state, coupled with my current ability to get out in the mountains more frequently since moving to Idaho, I will lay out the things that truly matter to prepare physically for a hunt and how to get ready for them. This advice will allow you to maximize your time in the woods, which will ultimately allow you to learn, see and explore more terrain. For all the remote scouting and planning that you did to prepare for your hunt, when your boots hit the ground out West, you want to make sure your feet, legs and lungs can carry you up those hills.
Here, in a very specific order, is my advice for physically preparing for a Western hunt. It’s not sexy, but it will allow you to maximize yourself out in the forest pursuing your intended target.
Break in your boots
If I had to give a single piece of advice for someone to physically prepare themselves for a mountain hunt, it would be this - leading up to the hunt, put on 50 MILES of walking in your boots. For those of you coming from flat states, those 50 miles can absolutely be done on flat terrain. The point of this is to break in your boots, and ultimately fall in love with their comfort factor. If your boots are something that make you cringe at the thought of putting them on, your hunt will be miserable.
Boots are the conduit through which a hunt is executed. There is no way that you can put on the proper number of miles per day out in the mountains with boots that cause blisters and don’t fit your feet properly. 50 miles might seem like a lot, but broken down over the course of a few months it is really quite simple. A morning walk of one mile, maybe taking 15 minutes each day, will get you to your goal in under two months time. Your boots should be your favorite piece of gear that you own and you should love having them on. Nothing will ruin a trip, or at the very least severely decrease the enjoyment level, than painful feet.
This isn’t to say that your feet won’t get beat up or banged around while on your hunt, but your boots should not be the primary source of that discomfort. The best example I have of properly loving your footwear is when my Dad shot his elk this past Fall, we wound up quartering it out and carrying a load back to camp, which didn’t bring us back into camp until 10 pm. Despite having a 16 hour day in the field and carrying a heavy load back, we sat down for dinner in a warm tent but neither of us felt the need to remove our boots because they were actually quite comfortable in the moment. You should not be coming back to camp and itching to rip off your boots to give your feet relief.
Therefore, the first focus of physical preparation for a Western hunt is - break in your boots (50 miles minimum) to the point that they are your favorite piece of gear and you love having them on your feet.
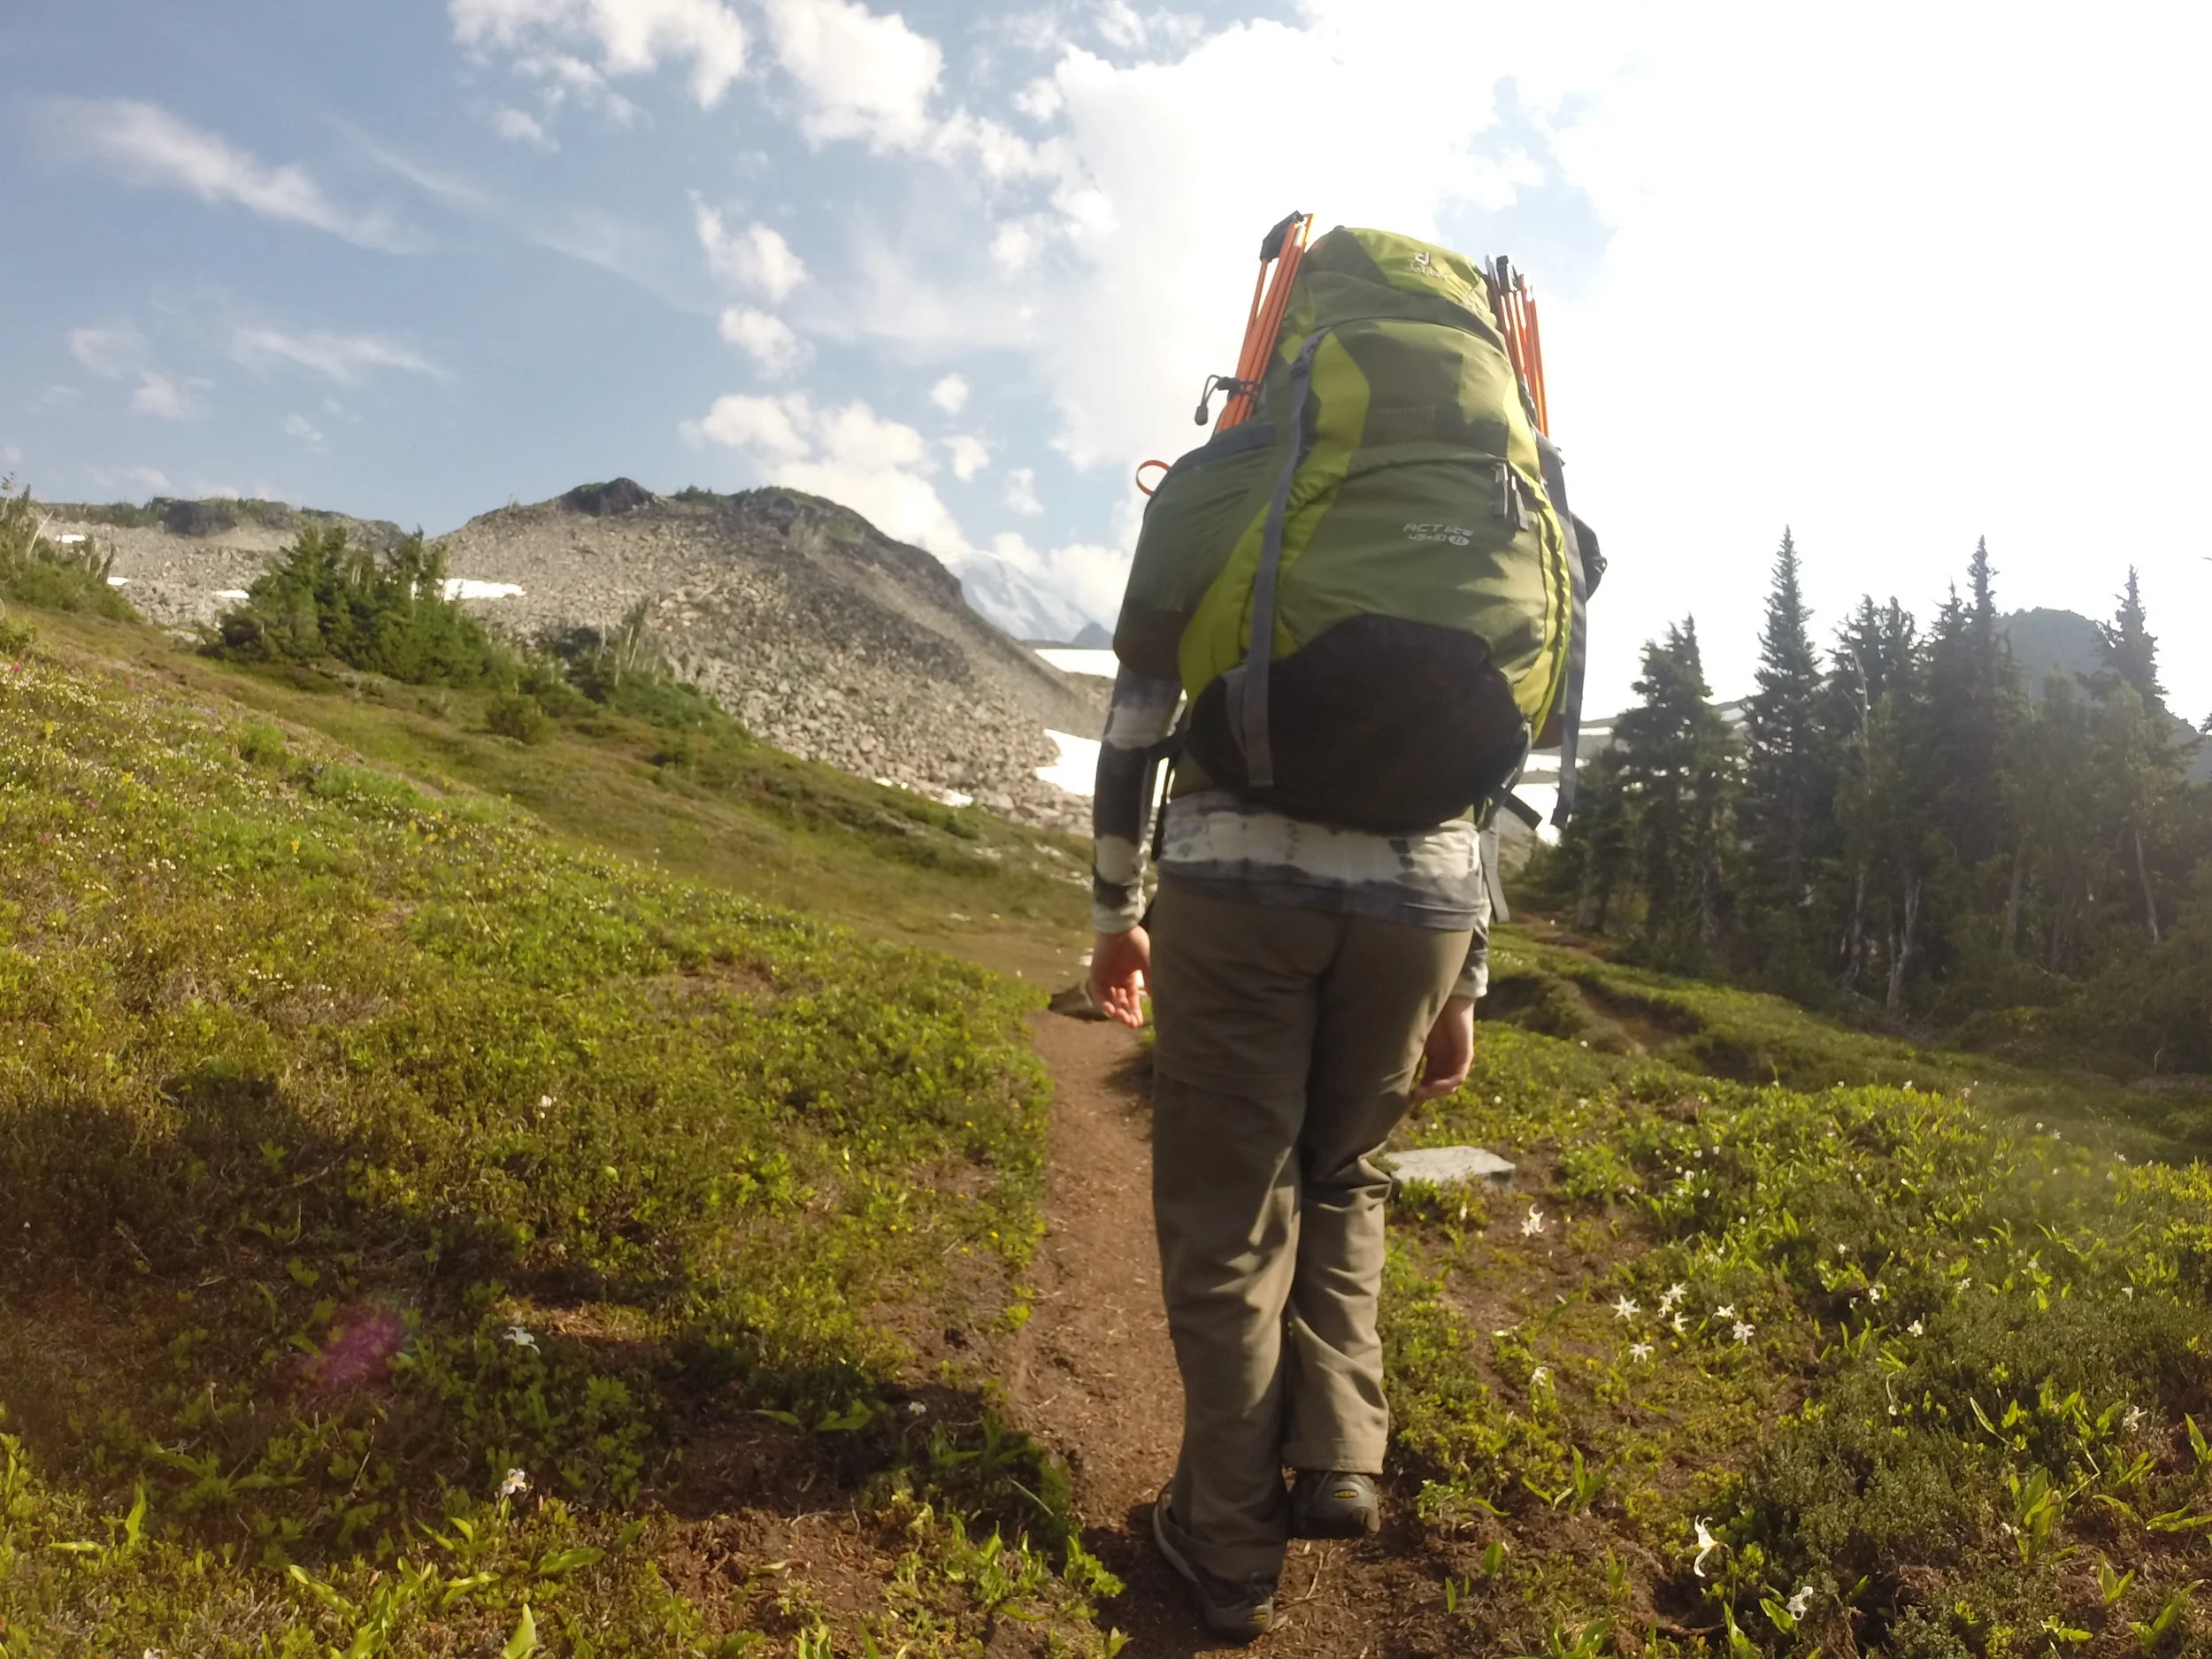
Wear your backpack
Assuming that the Western hunt you’re going on requires some sort of pack to be worn, the next advice I would give anyone is to wear your pack on numerous hikes and make sure the fit and comfort is correct. A lot of the principles of this advice is similar to breaking in boots, so I will spare repetitive paragraphs. I have had backpacks that aren’t fitted quite right between my shoulders and hip spacing and it has caused significant discomfort after the first five or so miles.
When I’m preparing for a Western hunt, my most common “workout” is going for a walk (both with and without elevation change) in the hunting boots that I will be wearing strapped to the backpack I am using for the hunt. I can further the workout by adding weight to the backpack. This starts preparing the body for carrying the weight required during the hunt. If you find yourself doing more puke-inducing workouts than simple walks with your boots and backpack on, I would caution you to think about what is best for minimizing risk of injury and what will actually lead to being best prepared for the hunt.
The second piece of advice for preparing for a Western hunt is - wear your backpack and slowly add weight to it over the course of a few months.
Sprint once per week
So far my advice may seem boring, unsexy and unfit for a great insta-story. Fine. You want something tough to do, here it is. Again, there is absolutely no need to walk in the front door of any gym to make this next piece of advice fit into your preparation for a Western hunt.
Once per week, when you’re feeling a surge of energy and focus, find an open field, a high school track, a set of stairs or any adequate space to allow you to execute an all out sprint that lasts 10-20 seconds. The science of sprint workouts is becoming quite clear that short, 100% effort bursts of energy are incredible for cardiovascular health, fat burning, sleep quality improvements and other overall health benefits. The other beautiful thing about a sprint workout is that it should not last more than 20 minutes total, including warm up and cool down.
Mark Sisson, of Mark’s Daily Apple, has a great two part series on the principles of doing a sprint work out. Here’s Part I and Part II. Let me cut to any hesitation that you may have of your natural sprinting abilities by saying that I am about the SLOWEST person that you will ever meets in terms of straight line speed, but the benefits of a sprint workout are still achieved because I can still give it my 100% output, even though my 100% output is honestly 5-6% of a good high school track star.
Here’s what I did for my sprint workout. I was lucky enough to live on a small bluff back in Minnesota. There was a stretch of grass along the street that was about 75 yards in total length from top to bottom. Starting from the bottom, I ran up the hill slowly once, turned around and walked back down, then immediately upon getting to the bottom did another very slow jog up the hill. I walked back to the bottom and swung my legs around in imitation mode of actual good sprinters getting ready on the block. When I felt good in my legs, I would start the real workout.
I would set my feet and body like a wide receiver in football and then give myself an internal countdown and “burst” off the line into a full on, 100% effort, sprint up the hill. To any passerby this would have looked like a gangly-legged buffoon trying to churn their legs through molasses, but to me it was a 100% all-out sprint. I’d hit the top and come to a stop. I’d walk back down and keep my legs loose by shaking them out and doing deep squats. I’d wait until my heart rate came down to a normal resting level and I was no longer breathing hard. Then I would repeat.
When I first started doing sprints, I only did four of these all out runs before being done. By the time I was a few weeks out from the hunt I was up to eight or so, depending on how I was feeling. You don’t need to do many sets to get the benefits. The third piece of advice to prepare for a Western hunt is, sprint once per week at 100% effort.
Work with Kettlebells (Turkish Get Ups & Swings)
My final piece of advice for preparing to go out West for a hunt finally brings some weights into play. However, to the disappointment of the testosterone oozing Machismo, I’m going to recommend exercises that require lighter than expected weights. This is also the one piece of advice that will likely require a purchase of a piece of equipment that you don’t need to bring along on your hunt - a single kettlebell.
I wrote about my workout routine preparing for my 2017 Idaho hunt in a previous blog post that can be read here. You can see that, even in the year and a half since I first wrote that post, I have changed my philosophy somewhat. In 2017, I don’t think that I was as focused on physical training for longevity that will allow me to do these types of hunts when I’m 60. A difference between those recommendations and this post is that I know don’t explicitly call out Yoga as a tool to use to prepare for a Western hunt. This is in part because I believe that one of the recommended kettlebell workouts achieves some of the objectives of a Yoga practice.
I’d highly recommend that a reader peruse Craigslist for a kettlebell to purchase. Bought new, kettlebells can cost anywhere from $2-4 per pound (so a 40 pound kettlebell could run your $160, max), but on Craiglslist the asking price is usually $1 per pound. I found a 40 pound kettlebell for $40, and I didn’t need a single other piece of equipment to do the workouts I am about to recommend. For reference sake, I am not by any means a powerlifter, but I have been working out for a number of years up to this point. If you compared the three common lifting movements (bench press, back squat, deadlift) to my body weight, I am probably capable of doing 75% of my bodyweight for bench, 125% of my bodyweight for squats and 150% of my bodyweight for deadlift.
Nothing special by any means, but I wanted to put this out just as a reference to my abilities and the fact that a 40 pound kettlebell worked well for me. I will offer one suggestion for those new to kettlebells - go significantly lighter than your ego wants you to lift. Both of these movements I recommend can and should be done with lighter weight.
The first move I would recommend learning is the Turkish Get Up. Important PSA, this is an incredibly complicated move, but the complexity involved is also why I value it so much. The Turkish Get Up (or TGU) is incredible for creating overall body stability, balance and core strength. To learn the move, I practiced with a tennis shoe for 3 weeks before I graduated myself to using the kettlebell. To use the tennis shoe, I created a punching fist with the hand of my arm that was extended and set the shoe on the flat part of the fist. This forced me to focus on moving slow and controlled throughout the entire movement, if I got jerky or rushed the shoe would lose its balance on my fist and fall off.
Once you graduate from the shoe, start with one rep per side. Do this for a few days until you feel you can add more. Keep adding reps, as your comfort level allows, until you get up to five reps per side. I never do more than five reps per side, but instead will opt to increase the weight of the kettlebell instead of adding more reps (which I haven’t even done yet). The point of doing TGU’s is to strengthen the core and build overall body stability and control, it is not to make yourself feel sore in the morning.
If you’re feeling good and you want to add in another movement with the kettlebell, I recommend Swings, demonstrated here. I never do more than 10 swings per set, and a typical workout consists of doing one set (10 swings), setting the kettlebell down until my heart rate comes back down to normal and then executing another set. I will do a max of 10 sets per workout (total of 100 swings), and once again my aim is to not be sore in the morning.
The intent of both the TGU and Swing exercises are to increase overall body stability and strength without adding too much mass. A huge part of what causes fatigue out in the field is how much weight you are carrying up the mountains. The weight comes in the form of weight that’s sitting on your pack, and weight that you’re carrying around in the form of your body. You don’t see too many heavy powerlifters wandering around miles back from a trailhead because their body composition makes it quite difficult. To really thrive on a backcountry hunt, you need functional strength without the bulk, which is why I value kettlebell workouts so highly.
There it is, four tactics to prepare the out of state hunter for a Western mountain hunt. No puking needed. No pools of sweat to bathe in. Just smart, strategic thinking about what often damages a hunt, and working up front to prevent those from being an issue while you’re out in the field. Following this advice won’t make a hunt totally carefree and without pain, but it will hopefully be pain that can be dealt with and managed (see an additional and highly recommended post on mental preparation for more info).
The four “workouts”, one final time:
1.) Break in your boots (50 miles) to the point that they are your favorite piece of gear
2.) Wear (and adjust) your backpack
3.) Sprint once per week (100% effort)
4.) Work with Kettlebells - Turkish Get Ups & Swings
Thanks for reading.
Kyle Zibrowski